6 pounder Hotchkiss gun.
How to make a QF 6 pounder Hotchkiss gun and mount.
How to make a WWI MKIV Tank.
Parent supervision required !!
With the Sponsons made its now time to make the gun mounts that will sit inside the sponsons and house a QF-6 pounder Hotchkiss guns.
For this simple project you will need:
An average Cereal sized Cardboard box or craft card.
Ruler or set square.
A craft knife or Scissors
Pencil or pen.
Acrylic or watercolour paint.
A paintbrush
PVA adhesive or sticky tape.
Glue spreader or glue stick.
Wine bottle cork.
3mm dowel or matchsticks.
Cotton buds.

Stage 1: Forming the gun housing.
Use Sheet 1.
To begin with, carefully cut around each gun housing template ensuring that the you do not remove any tabs. These are needed to form the gun housing. Also first using a compass, then a sharp pencil, make a small hole approx 3mm at the point marked with the small cross. It is easier to make the holes at this stage. 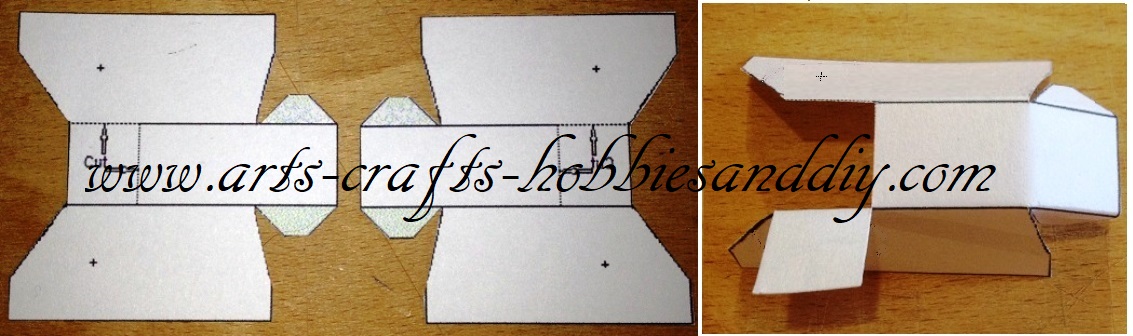
Make all folds on both the tabs and the gun mount to form its shape as shown above. With all the folds made, form the housing by carefully bending the back of the housing with the tabs on and sticking them in place. As shown. Notice that there's a square tab left after sticking. This will be used to fix the gun mount inside of the Sponson.
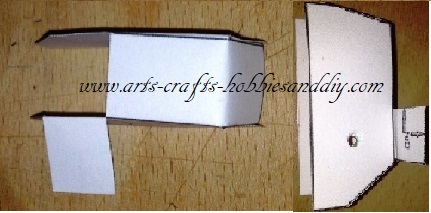
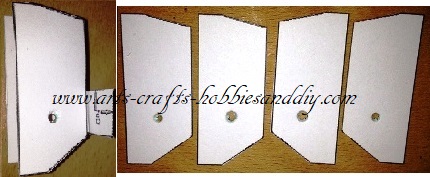
With the gun housing stuck together, its now ready for reinforcing. Do this by adding the spacers that are provided on the sheet. Firstly, using a compass or sharp pencil make 3mm holes at the point marked with a small cross. The same as with the housing template. Its best to add 3 spacers depending of course on the thickness of card being used. Fix them at the top of the housing for strength, (the side without the square tab). It also helps line the housing up with the aperture in the sponson. Then stick one or more to the bottom for reinforcing purposes to hold the 3mm dowel pin that will hold the gun in place. Hence there are extra spacers provided. 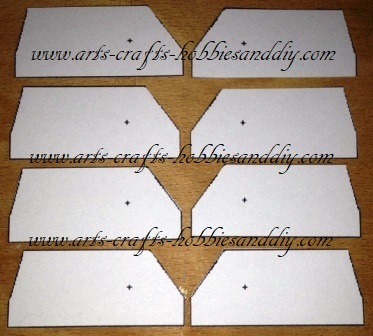
How to make a QF-6 pounder 6cwt Hotchkiss gun.
With the housing made it is now time to make the gun. Use a 20mm wine bottle cork, preferably the foam/synthetic type that has the rubbery coating. These are exactly the right size to fit in the housing of this model WWI tank. Mark off the cork at 15mm from the end. Do this with a ruler by keeping the end of the cork inline with the edge of the ruler and marking it at 15mm then carefully rotate the cork and make another mark.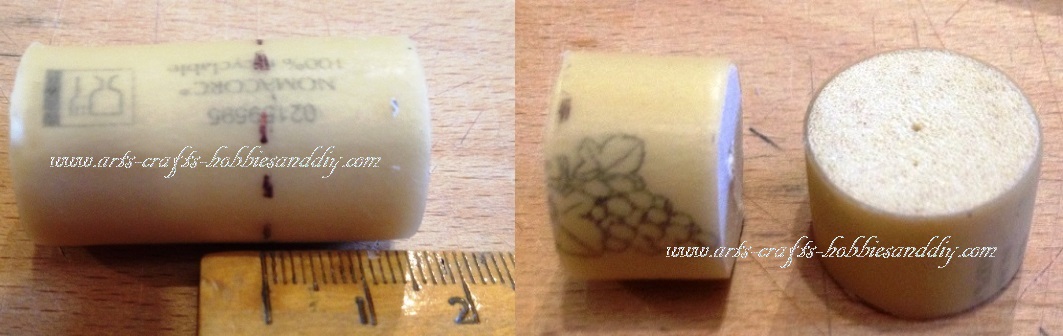
Continue this all around the cork then using a craft knife carefully cut the piece off. You will need to repeat this process again as 2 cork pieces are required.
However, if you haven't got a suitable cork, roll up 15mm strips of card to a diameter of 20mm. Wrap the card around a 3mm dowel, matchstick or cotton bud and apply glue to the card as its rolled. See PT5 Adding the exhaust system for reference.
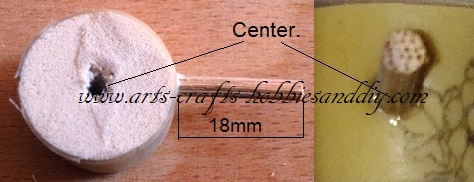
With the pieces of cork cut, the next thing to do is to drill a 3mm hole through the middle of the cork, as I have shown. Drill another 3mm hole in the side of the cork to take the Gun barrel. The gun barrel will also be made from a 3mm piece of dowel cut at approximately 22mm in length. As shown, and then glued into place leaving approx 18mm protruding from the cork. 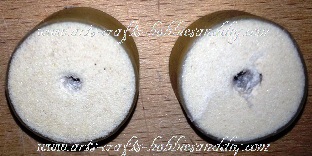
Fitting the QF 6-pounder 6 cwt Hotchkiss gun into the gun sponson
With the gun barrel fixed in place, take the gun housing and place the cork in the open end as can be seen. Line up the holes in the housing with the hole in the centre of the cork and insert either a 3mm dowel or a matchstick cut at approximately 22mm. Push the stick through the holes to fix the gun in place then put a spot of glue on the end of the dowel or matchstick to hold it there. 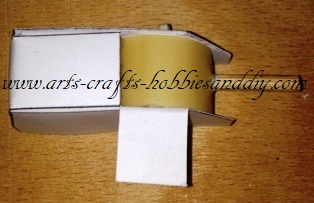
Now with both the Hotchkiss gun mounts and sponson made put them together. Take the Sponson and gun mount and place them as I have shown.  . Apply glue to the gun mount where indicated then place the sponson over the gun mount ensuring that the guns lined up with the opening. Hold it firmly in place making sure that the mount is fully in contact with the Sponson. Pegs may be needed for this.
Paint them or place them to one side as it is now time to build the WWI Landship tank track assemblies.