How to make a Heart shaped box.
How to make a Heart shaped gift box.
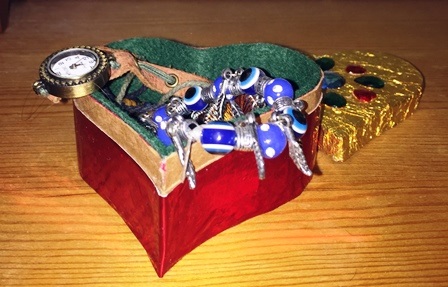
In this short tutorial, you will be learning How to make heart shaped box. It can be used for a heart shaped ring / jewellery box. A trinket box or just for decorative purposes or to house. Also special gift for a loved one on Valentines day.
For this simple project you will need:
A craft knife or Scissors.
Plain or coloured card.
A Ruler.
A set square.
Crayons or coloured pencils (optional).
Pastels or paints (optional).
Glitter (optional).
Foil paper (optional).
A paint brush (if using paint).
PVA adhesive or craft glue.
Small paint brush, Glue spreader or glue stick.
Making the bottom section of the box.

To begin, firstly decide how big you want your heart shaped box to be. Then draw your heart onto a suitably sized piece of craft card. It doesn't have to be perfect as it is a special handmade gift.
For the purpose of this demonstration tutorial I will be using an old cereal box to produce the parts needed. If you can use recycled materials it will keep costs down.
With the heart shape drawn it's now time to cut it out. This will be used firstly for a template as you will need more than one heart shaped piece of card for this simple project. Then, secondly to finish the box lid.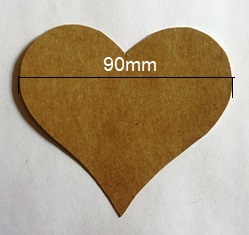
How to cut out a heart shape.
Once the template has been drawn and cut out make three more identical hearts because four templates are needed. Two templates will be used to form the base and lid and then another template will be used to cover all exposed fixing tabs when the sides have been formed. Place the heart template on the card and draw around it as shown. 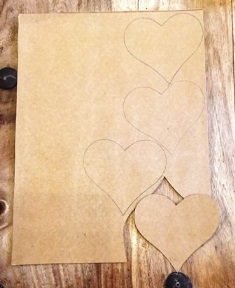 You will notice that I am using the same piece of card I drew my original template on. Also I have kept the other hearts to one side of the card. That's because I will be using the excess card to form one of the sides of my box.
Now using scissors cut around all of the templates. Cut carefully and slowly trying to stay on the line at all times. Once that's done place all three hearts to one side along with the template.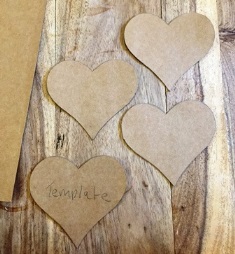
How to make the sides of a Trinket box.
With all the heart shapes cut out we can now start making the sides. To do this, firstly decide the overall height of your Heart shaped box. As my heart template's only 90mm at its widest point I am making my sides 40mm high including the lid. This is just under half its width which will be adequate and look proportionate to the overall size of the trinket box.
Making the lower section of the trinket box.
Having decided on an overall box height of 40mm including the lid, the lower part of the box will need to be 30mm high. Using the piece of card left from the heart templates, I will first draw a straight line along its length and then measure 30mm up so as to ensure I have a good straight edge on my box sides. I will also use a set square to make sure the ends are at 90 degrees. Next I'll need to add an extra 5mm to allow for fixing tabs which will be folded under a heart template so that the sides can be joined to them. 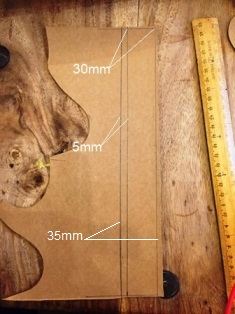
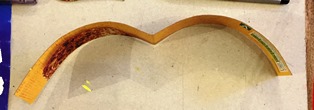
Once I have set out my side piece it is time to cut it out. For accuracy I used a straight edge and a craft knife so as to ensure all edges were even. Note: Make sure you cut on the two widest lines so as to leave the 5mm tab strip intact. Next gently score a line along the 5mm mark.
Hint: Take a pair of scissors or a pencil and draw the piece of card along the edge to start forming a slight curve as if you were trying to curl the card or a Christmas present ribbon. Using your heart template, try to form the card to the shape of the heart.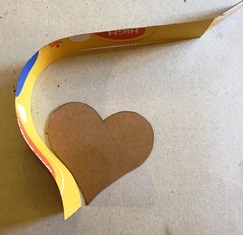
Now take a pair of scissors and create a comb effect on the 5mm strip as shown in the picture. The comb's important as you will need to form the card around the profile of the heart as you stick it. The comb ensures that the tabs do not cross each other when fixing. 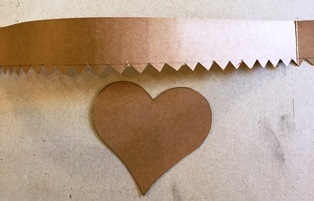
How to assemble a heart shaped box.
Next carefully bend each tab ready for fixing it to one of the heart templates. To fix the two together apply a thin layer of adhesive to each tab a and carefully fold the shape of the heart as can be seen below. Start at the bottom point of the heart as shown. 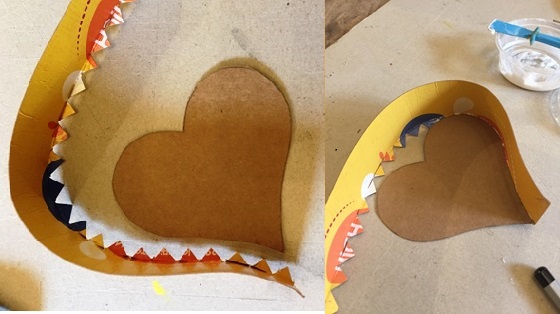 Place the heart against the edge of the side with the tabs underneath and bend and fix each tab to form the shape of the heart.
Once you have fixed the tabs to just before the middle of the heart, opposite the tip you will now need to score a fold line so as to enable you to form the rest of the heart. To score the line, first place the heart on a flat surface. Place it against something to prevent it from sliding as you will need to gently bend the rest of the card around to find where it meets the center point of the heart as shown below.
Now take a set square and place it on the flat surface so as to enable you to draw a fold line vertically up the card as shown. 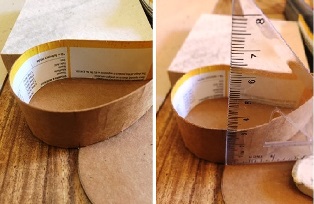
With the set square in position draw the line. With that done, hold a straight edge along the line and gently score it enough to allow you to bend the card as shown below.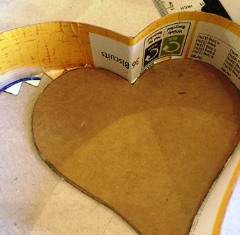
Forming the opposite side of the heart shaped box.
With one side of the heart now fixed firmly in place it is time to form the opposite side. Repeat the same process as before. If needs be, use the pencil again to shape the card to fit the heart. Note: Use weights to hold the sides in place while the heart dries thoroughly.
Forming the point of the Heart.
Now that both sides are formed, trim off any excess card to form the point of the heart. Carefully line up the excess card with the end of the heart ensuring that the point is vertical and then cut it off. With that done, apply a thin coat of adhesive to both ends of the card and stick them together. Hint: Use a piece of sticky tape to hold them in place until stuck firmly, as shown. 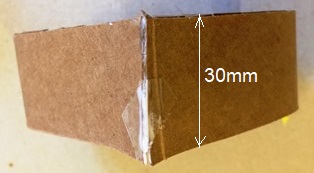
Adding the base to the box.
With the heart shaped box now formed it is time to take another of the heart templates as mentioned at the start of this tutorial and stick it to the bottom of the box. Turn the box over and apply a thin layer of glue to the whole area as shown and then stick the second template in place to cover all tabs as shown. Gently rub over the whole surface to ensure full contact between both surfaces. 
Making the Base lid insert.
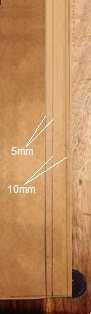
 For the lid to fit on the base you will need to make an insert that will create a lip to hold the lid. To do this first take another piece of card and measure from the bottom of the inside of the box and then add another 5mm to 10mm depending on the size of your base. This will form a lip to pick up the box lid. For this I am using ordinary card but you may find it easier to use thin corrugated card.
As with forming the heart box sides, again using a pencil, I will first start roughly forming the inside of the heart box as shown.
With that done it can now be stuck inside the box as shown below.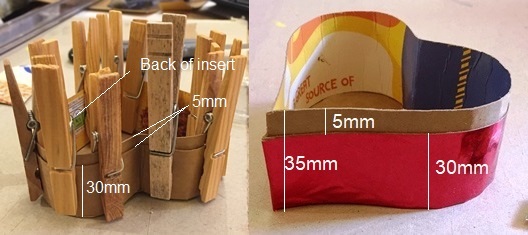
How to make a trinket box lid.
 As with the box base, we will now repeat the process for the box lid only this time the side measurements will be different. As mentioned at the start of this tutorial the full height of the box shown will be 40mm. The box base is all ready 30mm the lid height for the box will be 10mm. Note: There will be no insert required for the lid as the insert lip has already been formed.
With that in mind I am going to repeat the process for How to make the sides of a Trinket box only this time the lid side height will be 10mm. This means that as with the base I will first need to cut a length of card 15mm wide. That being 10mm for the side height and 5mm for the fixing tabs as shown.
Again, I will first start shaping my side using a pencil before carefully attaching it to a third heart template that was prepared earlier. Once the side's roughly shaped it can then be stuck to the heart template. Use the same method used for the base.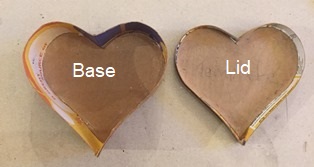
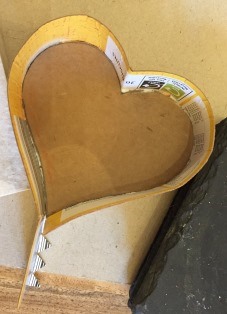
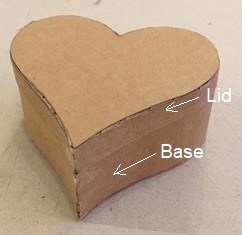 Once I have completed making the lid it can be placed on the base to test it for size and fit as shown below. Hint: However, if it is slightly out of shape either try carefully re-shaping it with a pencil first, If that does not work lightly dampen the area that is out of shape and fit the lid to the box. Then leave it to dry thoroughly before removing it to decorate.
Decorating the heart shaped box.
With the box now complete it is time to decorate it. You can use absolutely anything you want to decorate your box. For this box I used,