Bunny Easter egg holder.
Ks2 to Ks3 Easter holidays craft project.
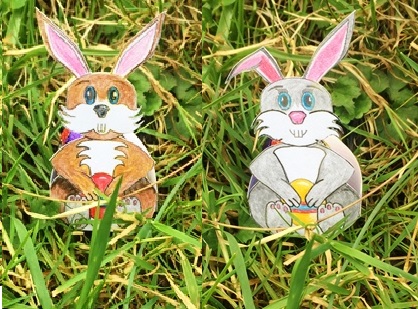
This easy project is especially perfect if you are planning an Easter holidays Easter egg hunt. Each Bunny Easter egg holder can be painted or decorated differently and then used to hide small Chocolate cream eggs around your garden.
Free downloadable templates.
For this simple project you will need.
A craft knife or Scissors.
Plain or coloured card.
A Ruler.
Crayons or coloured pencils (optional).
pastels or paints (optional).
A paint brush (if using paint).
PVA adhesive or craft glue.
Small paint brush, Glue spreader or glue stick.
Making a Bunny Easter egg holder.
To begin with, firstly download the Free Easter Bunny Easter egg holder image into your chosen file. Secondly, open the image in your preferred photo editing suite, MS Paint or similar. If you are using a standard size cream egg like the one used in this tutorial you will need to select print and then print the image at 100% normal size.
However, if you wish to make a larger version for a bigger Easter egg you will need to scale the image accordingly. For a rough guide the egg used in this tutorial measures approximately 50mm high x 35mm wide so for example if you have an egg that measures 100mm high x 70mm wide then I would double the size of the actual image.
Download two free Easter Bunny templates.
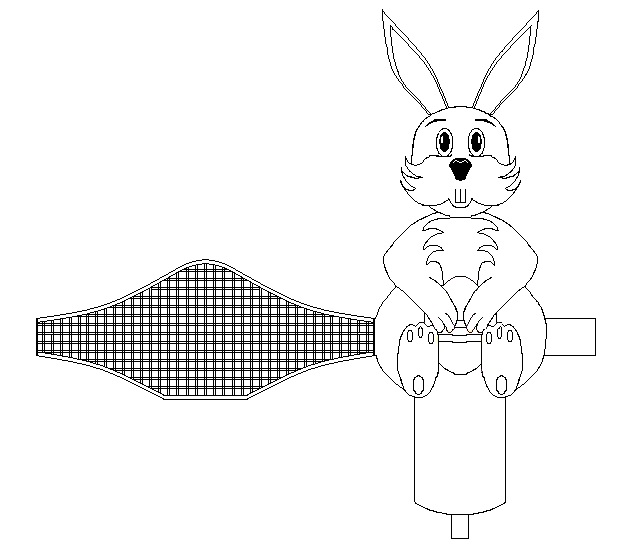
Click on the image to download it:

Click on the image to download it:
Once the free Bunny templates been downloaded and printed off its now time to carefully cut it out. 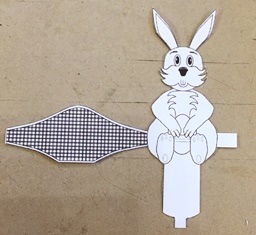
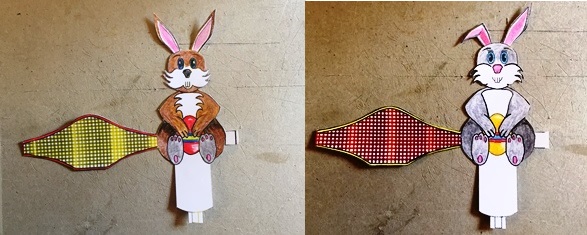
Once the template has been cut out I recommend colouring it first before assembly.
In order to easily assemble the free Easter egg holder bend all the tabs as shown below. Note: You will need to make four folds. Firstly fold Tab A located on the end of the template at the base, marked as A. Secondly fold the tab on the right hand side of the template marked as B. The third is the actual part of the template that will form the holder for the egg, marked as C and lastly the fourth, marked D forms the base of the egg holder..gif)
With all the tabs bent the egg holders now ready for assembly. Once dry you can place your Easter egg in the holder behind the Easter Bunny. As shown in the images at the start of this tutorial then hide them in your chosen hiding places.
.